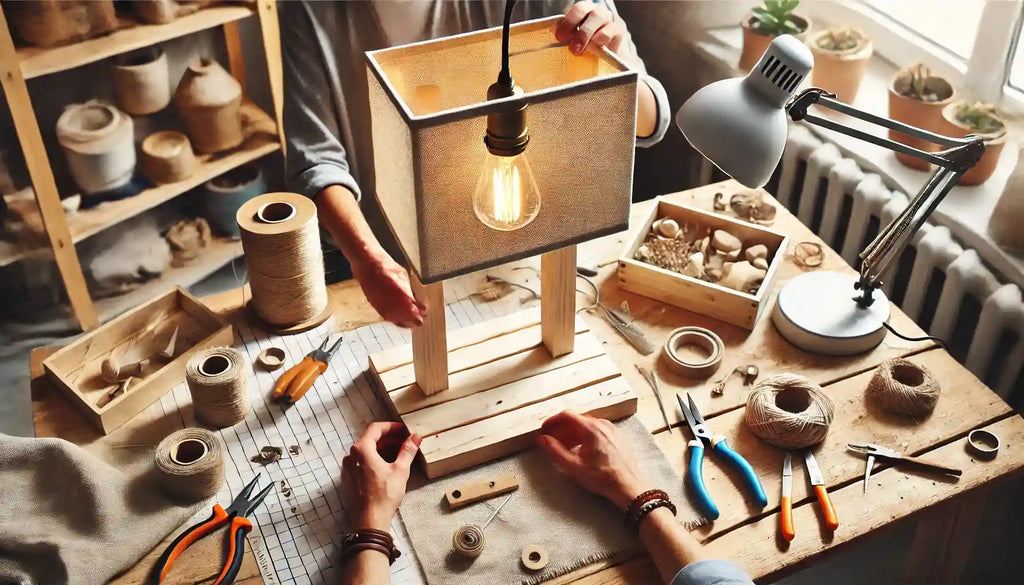
DIY: Make your own bedside lamp in 5 easy steps
Summary
- 1. Introduction to the DIY project
- 2. List of necessary materials
- 3. Step-by-step instructions
- 4. Customization Tips
- 5. Safety Tips
1. Introduction to the DIY project
Creating your own bedside lamp is an exciting and rewarding DIY (Do It Yourself) project. This project will not only save you money but also give you the satisfaction of creating something useful with your own hands. This article is designed to guide you through the process, step by step, so that even DIY novices can make their own unique lamp.
- Gaining independence: You will learn to assemble a lamp using basic DIY skills.
- Economical: By making your own lamp, you can reduce costs compared to buying in a store.
- Customization: The project allows complete freedom to adapt the lamp to your style and needs.
In summary, this DIY project to make a bedside lamp will bring you personal satisfaction, savings, and creative flexibility.
2. List of necessary materials
Before you begin building your DIY bedside lamp, it's essential to gather all the necessary supplies. Careful preparation will simplify the construction process and ensure a high-quality end result.
- Lamp base: Choose a solid and aesthetically pleasing base to provide stability and elegance to your creation.
- Electrical wire: A quality wire is essential to ensure the safety of your lamp.
- Socket and bulb: Choose a socket compatible with the bulb chosen for optimal brightness.
- Lampshade: This is the key element to personalize the aesthetics of your lamp.
- Connectors and switch: Make sure your lamp is convenient to use on a daily basis.
With this complete list, you will be well equipped to successfully complete your DIY bedside lamp project.
3. Step-by-step instructions
To complete this bedside lamp project, follow these detailed step-by-step instructions. Each step will guide you to assemble your lamp efficiently and safely.
3.1 First step
The first step is to prepare the base of your lamp. It is crucial to choose and drill the base to accommodate the electrical components.
- Base selection: Opt for a resistant material to guarantee the lamp's durability.
- Drilling: Drill a hole large enough to pass the electrical wire through.
- Finishing: Smooth the edges to avoid damaging the electrical wire.
This subsection highlights the essential elements for properly preparing the base of your lamp.
3.2 Second step
Next, it's time to prepare the wiring for your lamp. This process involves installing the wire and securely connecting the socket.
- Inserting the wire: Pass the electrical wire through the base to the socket.
- Socket attachment: Connect the socket to the wire according to the manufacturer's instructions.
- Safety: Use connectors to secure electrical connections.
This subsection highlights the essential elements for properly wiring your lamp.
3.3 Third step
The next step is attaching the lampshade. This step is crucial in determining the style and diffusion of light from your lamp.
- Choosing the lampshade: Select a lampshade that matches the decor and diffuses the light pleasantly.
- Installation: Attach the lampshade to the socket, ensuring that it is stable.
- Orientation: Adjust the angle of the lampshade to obtain the desired lighting.
This subsection highlights the essential elements for properly integrating a lampshade into your lamp.
3.4 Fourth step
Now you need to connect the switch to your lamp's electrical system. This step is essential for the switch to function properly.
- Switch selection: Select a switch that is easy to use and matches the design of your lamp.
- Installation: Place the switch on the wire in an easily accessible location.
- Test: Check that the switch works correctly to turn the lamp on and off.
This subsection highlights the essential elements for integrating a reliable switch into your lamp.
3.5 Fifth step
The final step is to test the lamp. This will ensure that each component functions as intended and that the lamp is safe to use.
- Safety check: Make sure there are no bare wires or dangerous connections.
- Dry test: Turn on the lamp to check if it illuminates effectively.
- Final inspection: Examine the overall appearance of the lamp for any additional aesthetic adjustments.
This subsection highlights the essential elements to verify the proper functioning and safety of your lamp.
4. Customization Tips
Once you've created your DIY bedside lamp, add a personal touch by customizing it to your liking. Here are a few ideas to improve its appearance and functionality.
- Painting and decoration: Personalize the base using paints or stickers to reflect your aesthetic.
- Choice of materials: Experiment with different materials for the lampshade, such as fabric, metal or paper.
- Lighting: Adjust the light intensity by choosing dimmable bulbs.
In summary, these tips allow you to transform your lamp into a unique piece that stands out.
5. Safety Tips
When making a bedside lamp, safety should always be a priority. Follow these recommendations to ensure safe and secure use of your lamp.
- Use of certified equipment: Choose certified electrical materials to prevent the risk of fire or electric shock.
- Regular inspection: Regularly check the condition of the cables and electrical connections.
- Positioning: Place the lamp on a stable surface and away from flammable materials.
In summary, these safety tips help you avoid accidents and enjoy your DIY bedside lamp with peace of mind.
Conclusion
By making your own bedside lamp through these five simple steps, you have not only expressed your creativity, but also added a unique piece to your interior decor.
This DIY project invites you to continue this exciting adventure of crafting and experimenting with new materials and styles.
🔍 Now enjoy seeing how a handmade bedside lamp illuminates your space . Explore our resources to take your lighting creations further!
Additional resources
🛒 Discover our collection of bedside lamps
📖 Read: The 10 best bedside lamps for a cozy atmosphere
-
Posted in
lampe-a-personnaliser


